PerfVis
Installation Guide
This section provides a guide to set up the different parts of the visualization and configure them correctly. You need to set up 4 parts for the visualization to work: The Pharo environemt, the webserver, the Unity Project and the HoloLens. The setup can be run in two different ways:
- The Pharo environemt, the webserver and the Unity Project running on the same machine.
- The webserver and Pharo environment on one machine and the Unity project on another.
 Two ways to set up PerfVis
No matter which setup you choose, the instructions stay the same. These instructions result in a visualization of the Roassal2 Library in Pharo. We assume that the reader has basic knowledge in the navigation of C-Sharp, Pharo Code and the command line interface.
Required Tools
For the visualization to work you will require:
-
HoloLens
-
Computer running Windows, build 14318 or later
-
Wireless network
-
(Optional) Another computer Make sure that all machines are in the same wireless network.
Install Tools and Environments
Pharo Environment
-
Download a new Pharo image and VM if necessary
-
Install Spy2 through the Catalog Browser
-
Open the Monticello Browser, click +Repository and select smalltalkhub.com
-
Enter owner: merino and project: SpyToHolo and select OK
-
Select Spy2-Examples-LeonelMerino.49.mcz and click Load
-
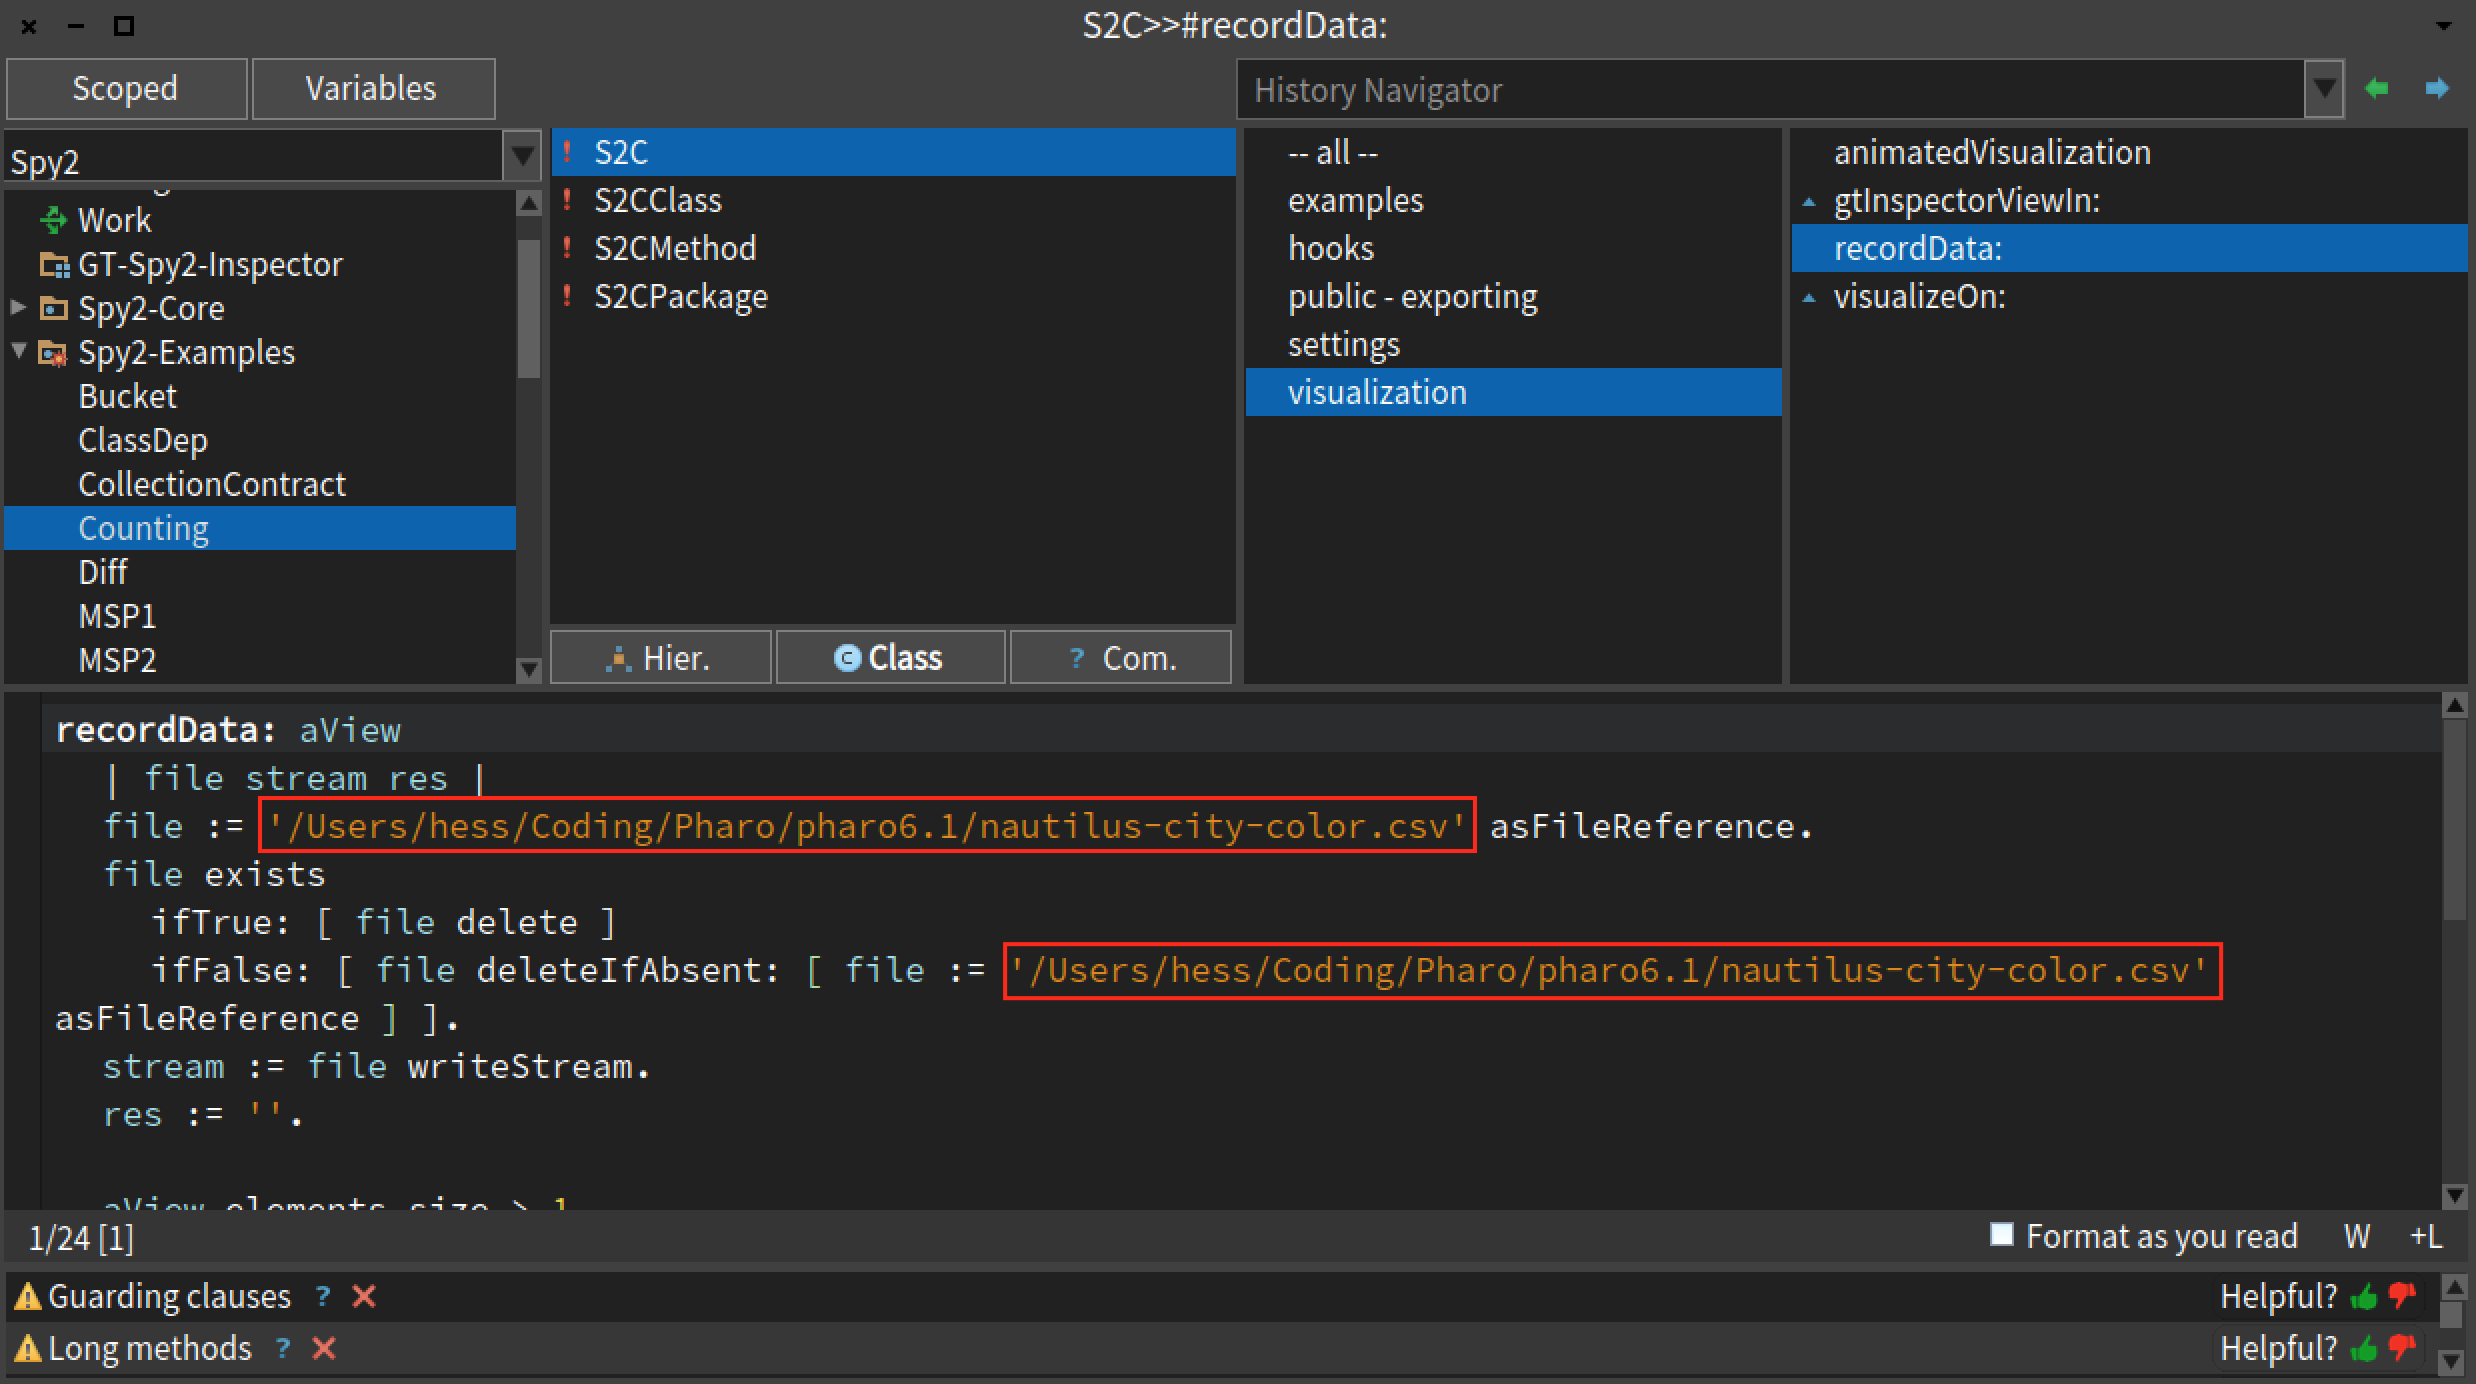
Open the System Browser and select Spy-Examples > Counting > S2C > visualization > recordData:
-
Set the file reference to your prefered save location, for example 'Users/hess/Desktop/city-colors.csv'
-
Open a new Playground and write
profiler := S2C new. profiler startOnPackageNamed: 'Roassal2'. profiler animatedVisualization. -
Select the three lines and Inspect It
-
After a moment the Inspector opens, Spy2 is now monitoring
-
To stop Spy2, run S2Profiler remove
 Code reference for the save location of the pharo file
Webserver
For the webserver we will use Python, since it offers an easy to set up webserver to serve from the filesystem, but any other webserver work as well. The webserver needs to be running on the same machine as the Pharo Environment.
-
Aquire a distribution of Python and install it
-
In your Console, navigate to the location you set the save location to earlier, in our example 'Users/hess/Desktop'
-
Run py -m http.server 8000 in the Console
-
Remember the IP address and port of the webserver, for example 192.168.2.3:8000
Unity Project & HoloLens
-
Download Unity 2017.3.0b8
-
Download the Unity project from href{...}{to be added} and open it
-
In Unity, select the Cube GameObject, and set the URL variable of the UpdateData.cs component to {webserver IP-address}/{file name}, in our example 192.168.2.3:8000/city-colors.csv
-
On your HoloLens, go to the Microsoft Store and install the Holographic Remoting Player.
-
On your HoloLens, start the Holographic Remoting Player.
-
In Unity, go to the Window menu and select Holographic Emulation
-
Set Emulation Mode to Remote to Device and enter your HoloLens' IP address for Remote Machine
-
Click Connect. The Connection Status should change to Connected and the screen in your HoloLens should go blank
Running the Visualization
The different parts should now be connected and configured properly. Before entering play mode make sure that the Inspector Window in Pharo is not minimized and visible. Otherwise the metrics will not be updated.
You can now enter Play Mode in Unity. After a couple seconds you should see the visualization. You will notice that there are always two classes active. We suspect this is due to the Inspector Window, which needs to be open and displaying the metrics, for those to also be written to the file.
An easy way to stress Roassal2 is to the World Menu > Roassal > Roassal Examples, select any category and play around with some examples.
Apendix
- Git Repository with source code: git://scg.unibe.ch/project-hess-holo-2018